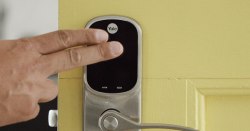
Installing Your Video Doorbell
Video Doorbells Install Guide PDF
The Video Doorbell provides HD video of who or what is at your front door. It is equipped with a 180° field of view and a built-in microphone and speaker, so you can see, hear, and speak to anyone on your doorstep using your app.
It also connects to your home Wi-Fi and begins recording anytime someone rings it or if motion is detected.
The instructions below feature a slimline model, but they are similar for the round video doorbell, as well.
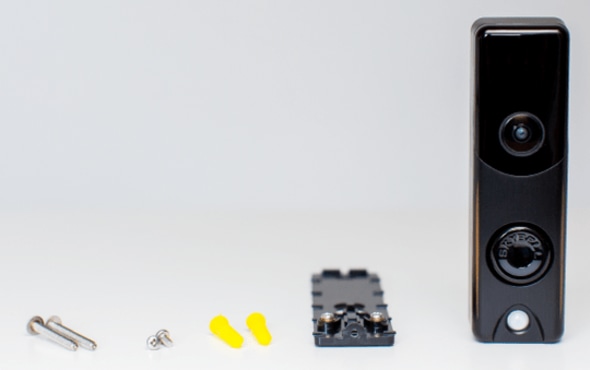
Installation parts
- Video doorbell (slimline or round model)
- Wall mounting bracket
- Mounting screws and wall anchors
- Digital chime adapter (optional, if needed)
Pre-Installation Checklist
In order to make sure your existing doorbell setup is compatible with this device, you’ll need to check the following items.
1. Your existing doorbell should be wired, not electric or battery powered.
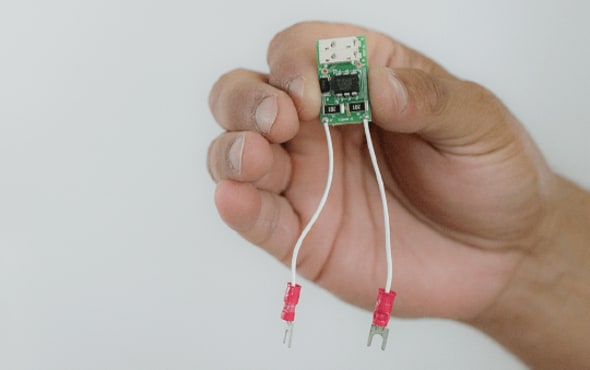
2. Your doorbell chime should be mechanical, which will typically make a standard “ding-dong” sound. A digital chime will usually have a custom melody and often have a speaker included with the doorbell.
If you have a digital chime, you’ll use the digital adapter (see photo below) and the instructions in your manual to convert it to a mechanical one.
3. Make sure the Wi-Fi at the doorbell location has an upload speed of at least 2Mbps. You can use your smartphone and the instructions in your installation manual to check this speed, or call a virtual Smart Home Pro for more recommendations.
If you have any questions about these pre-installation steps, call our virtual Smart Home Pro line for assistance.
Installation Instructions
1. Carefully remove your existing doorbell by unscrewing and detaching as needed.
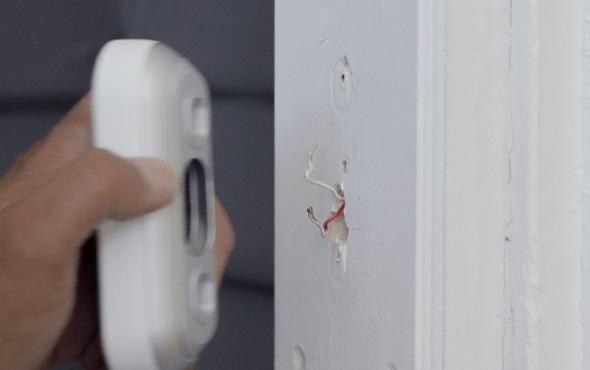
2. Make sure the existing doorbell wires don’t slip back into the wall
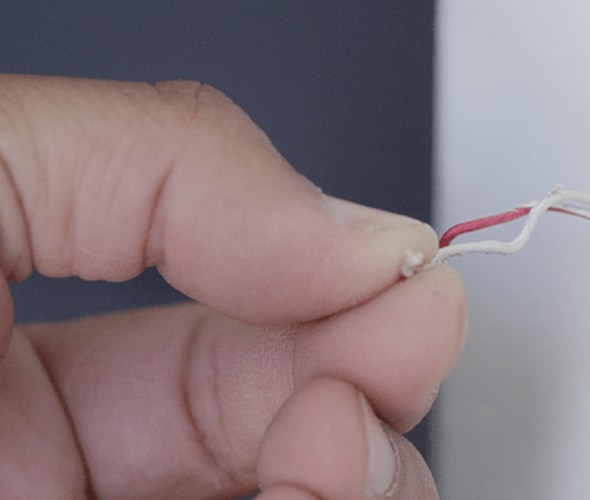
3. Take the mounting bracket and feed the existing doorbell wires through the hole in the center. Make sure the bracket is leveled, then secure firmly to the wall using the provided wall screws
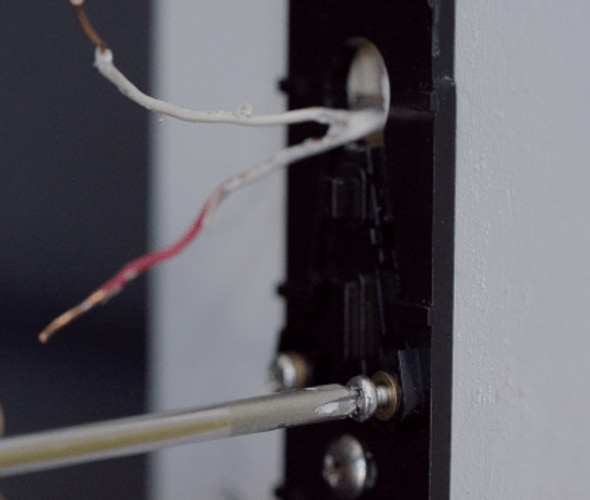
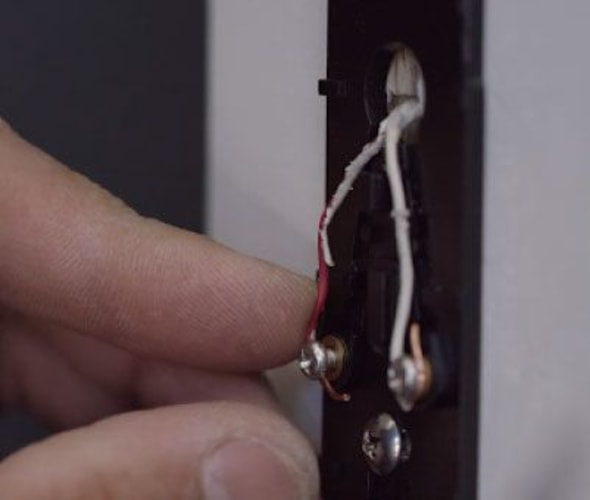
4. Loosen the two terminal screws on the front of the mounting bracket. Take the existing doorbell wires and attach one wire to each of the screws, then tighten the screws. It doesn't matter which wire goes to which screws, as long as each wire has a good connection to the screws and they aren't touching each other.
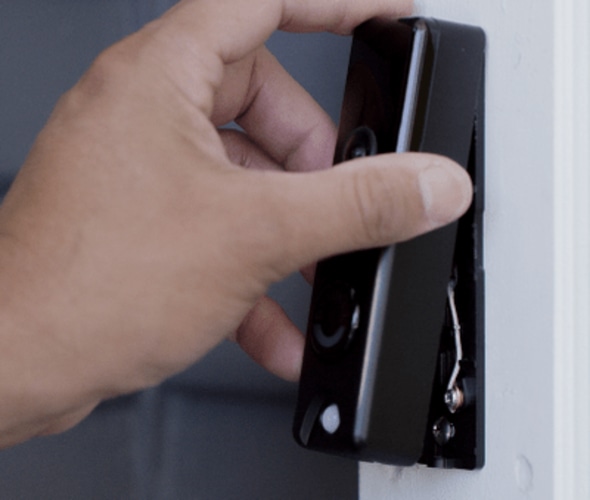
5. Remove the holding screw on the bottom of mounting bracket, then attach the video doorbell to the mounting bracket and tighten holding screw to the bottom of the camera

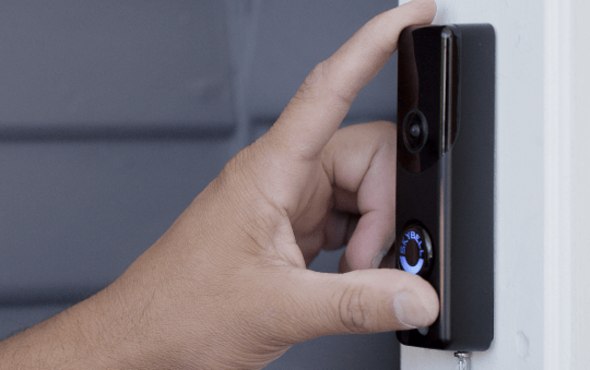
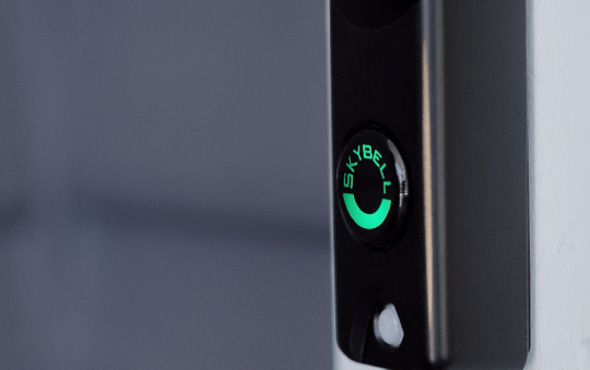
6. Video doorbell’s LED light should flash as it powers up and connects.
Controlling your device
View and interact with the live stream
Users can only view live video from a Video Doorbell using the following devices/platforms:
- The A3 Smart Home app on an Apple or Android mobile device (e.g., smartphone or tablet).
- Your touch-screen control panel
To start streaming the Video Doorbell from your app
- Log into your A3 Smart Home app
- Tap the Menu button (located in the top left)
- Tap Doorbell Camera
- Tap Start Video
To talk through the Video Doorbell from your app
- Log into your A3 Smart Home app
- Tap the Menu button (located in the top left)
- Tap Doorbell Camera
- Tap Start Video
- Tap and hold Hold to Talk
- To end the call and exit from the live stream, tap End Call
Other Device Install Guides